What you will learn
- Understand how the Functions Skill bridges conversation and backend execution.
- Configure a function: name, instructions, webhook, parameters, and headers.
- Set up Agent-to-Agent (A2A) calling to route specialized queries.
- Debug function calls using the Logs tab in the Launch Pad.
How the Functions Skill Works
The Functions Skill bridges the gap between conversational AI and backend execution. It allows raia agents to dynamically execute custom backend functions — retrieving CRM data, booking appointments, triggering actions in other software, or querying databases — based entirely on user intent.
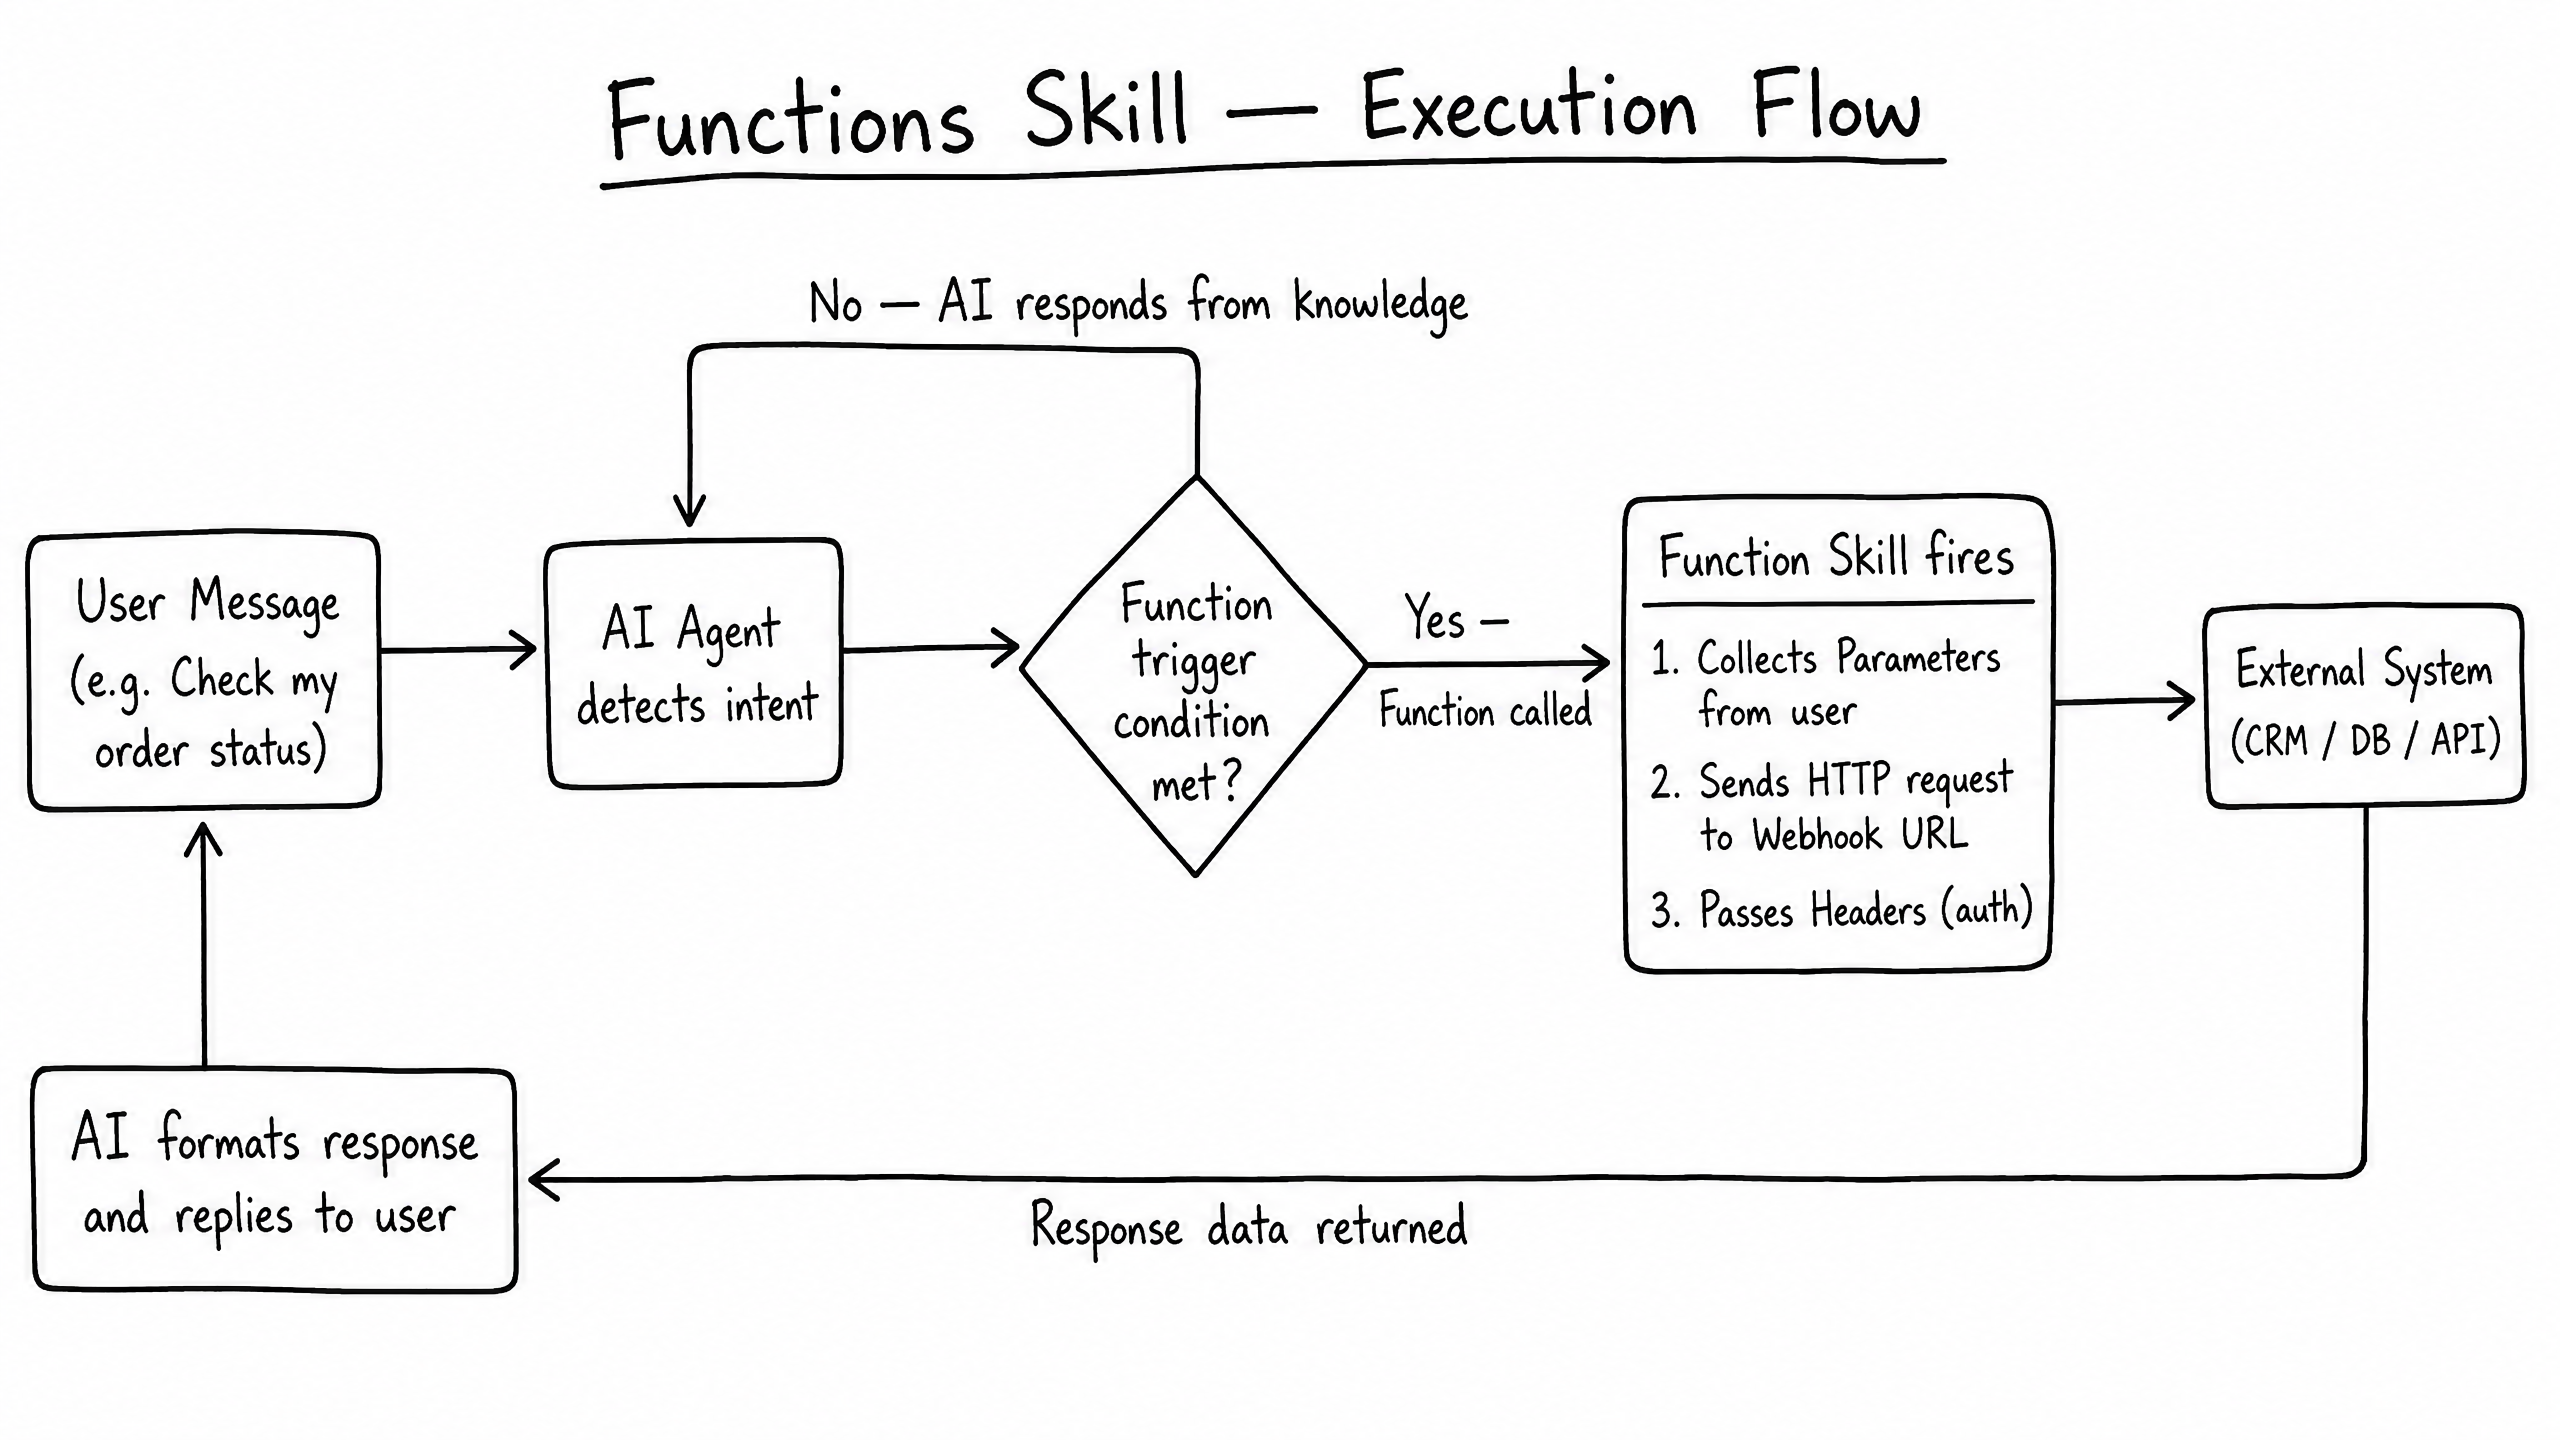
Instead of just answering questions from static vector store knowledge, an agent equipped with the Functions Skill recognizes when a request requires external data or action. If a user asks "Can you check the status of my order?", the agent detects the intent, extracts the parameters (like an order number), calls the get_order_status function via a webhook, and returns the live result in natural language.
Configuring a Function
In the Skills tab of the Launch Pad, toggle the Functions Skill to Active and click Create Function. Define each of the following fields:
Field 01
Function Name
A clear, user-friendly label (e.g., Check Order Status).
Field 02
Internal Name
A unique system identifier used in code (e.g., get_order_status).
Field 03
Status
Keep it private to your agent, or share it globally across your organization's Functions Library.
Field 04
Instructions
A prompt telling the AI exactly when and how to use this function. Critical for accurate intent detection.
Field 05
Webhook to Call
The external HTTP endpoint (URL) the AI will contact to execute the task.
Field 06
Parameters
The data inputs the AI collects from the user (e.g., email, order_id) to send to the webhook.
Field 07
Headers
Securely pass authentication credentials (Bearer tokens, API keys) required by the external API.
Agent-to-Agent (A2A) Calling
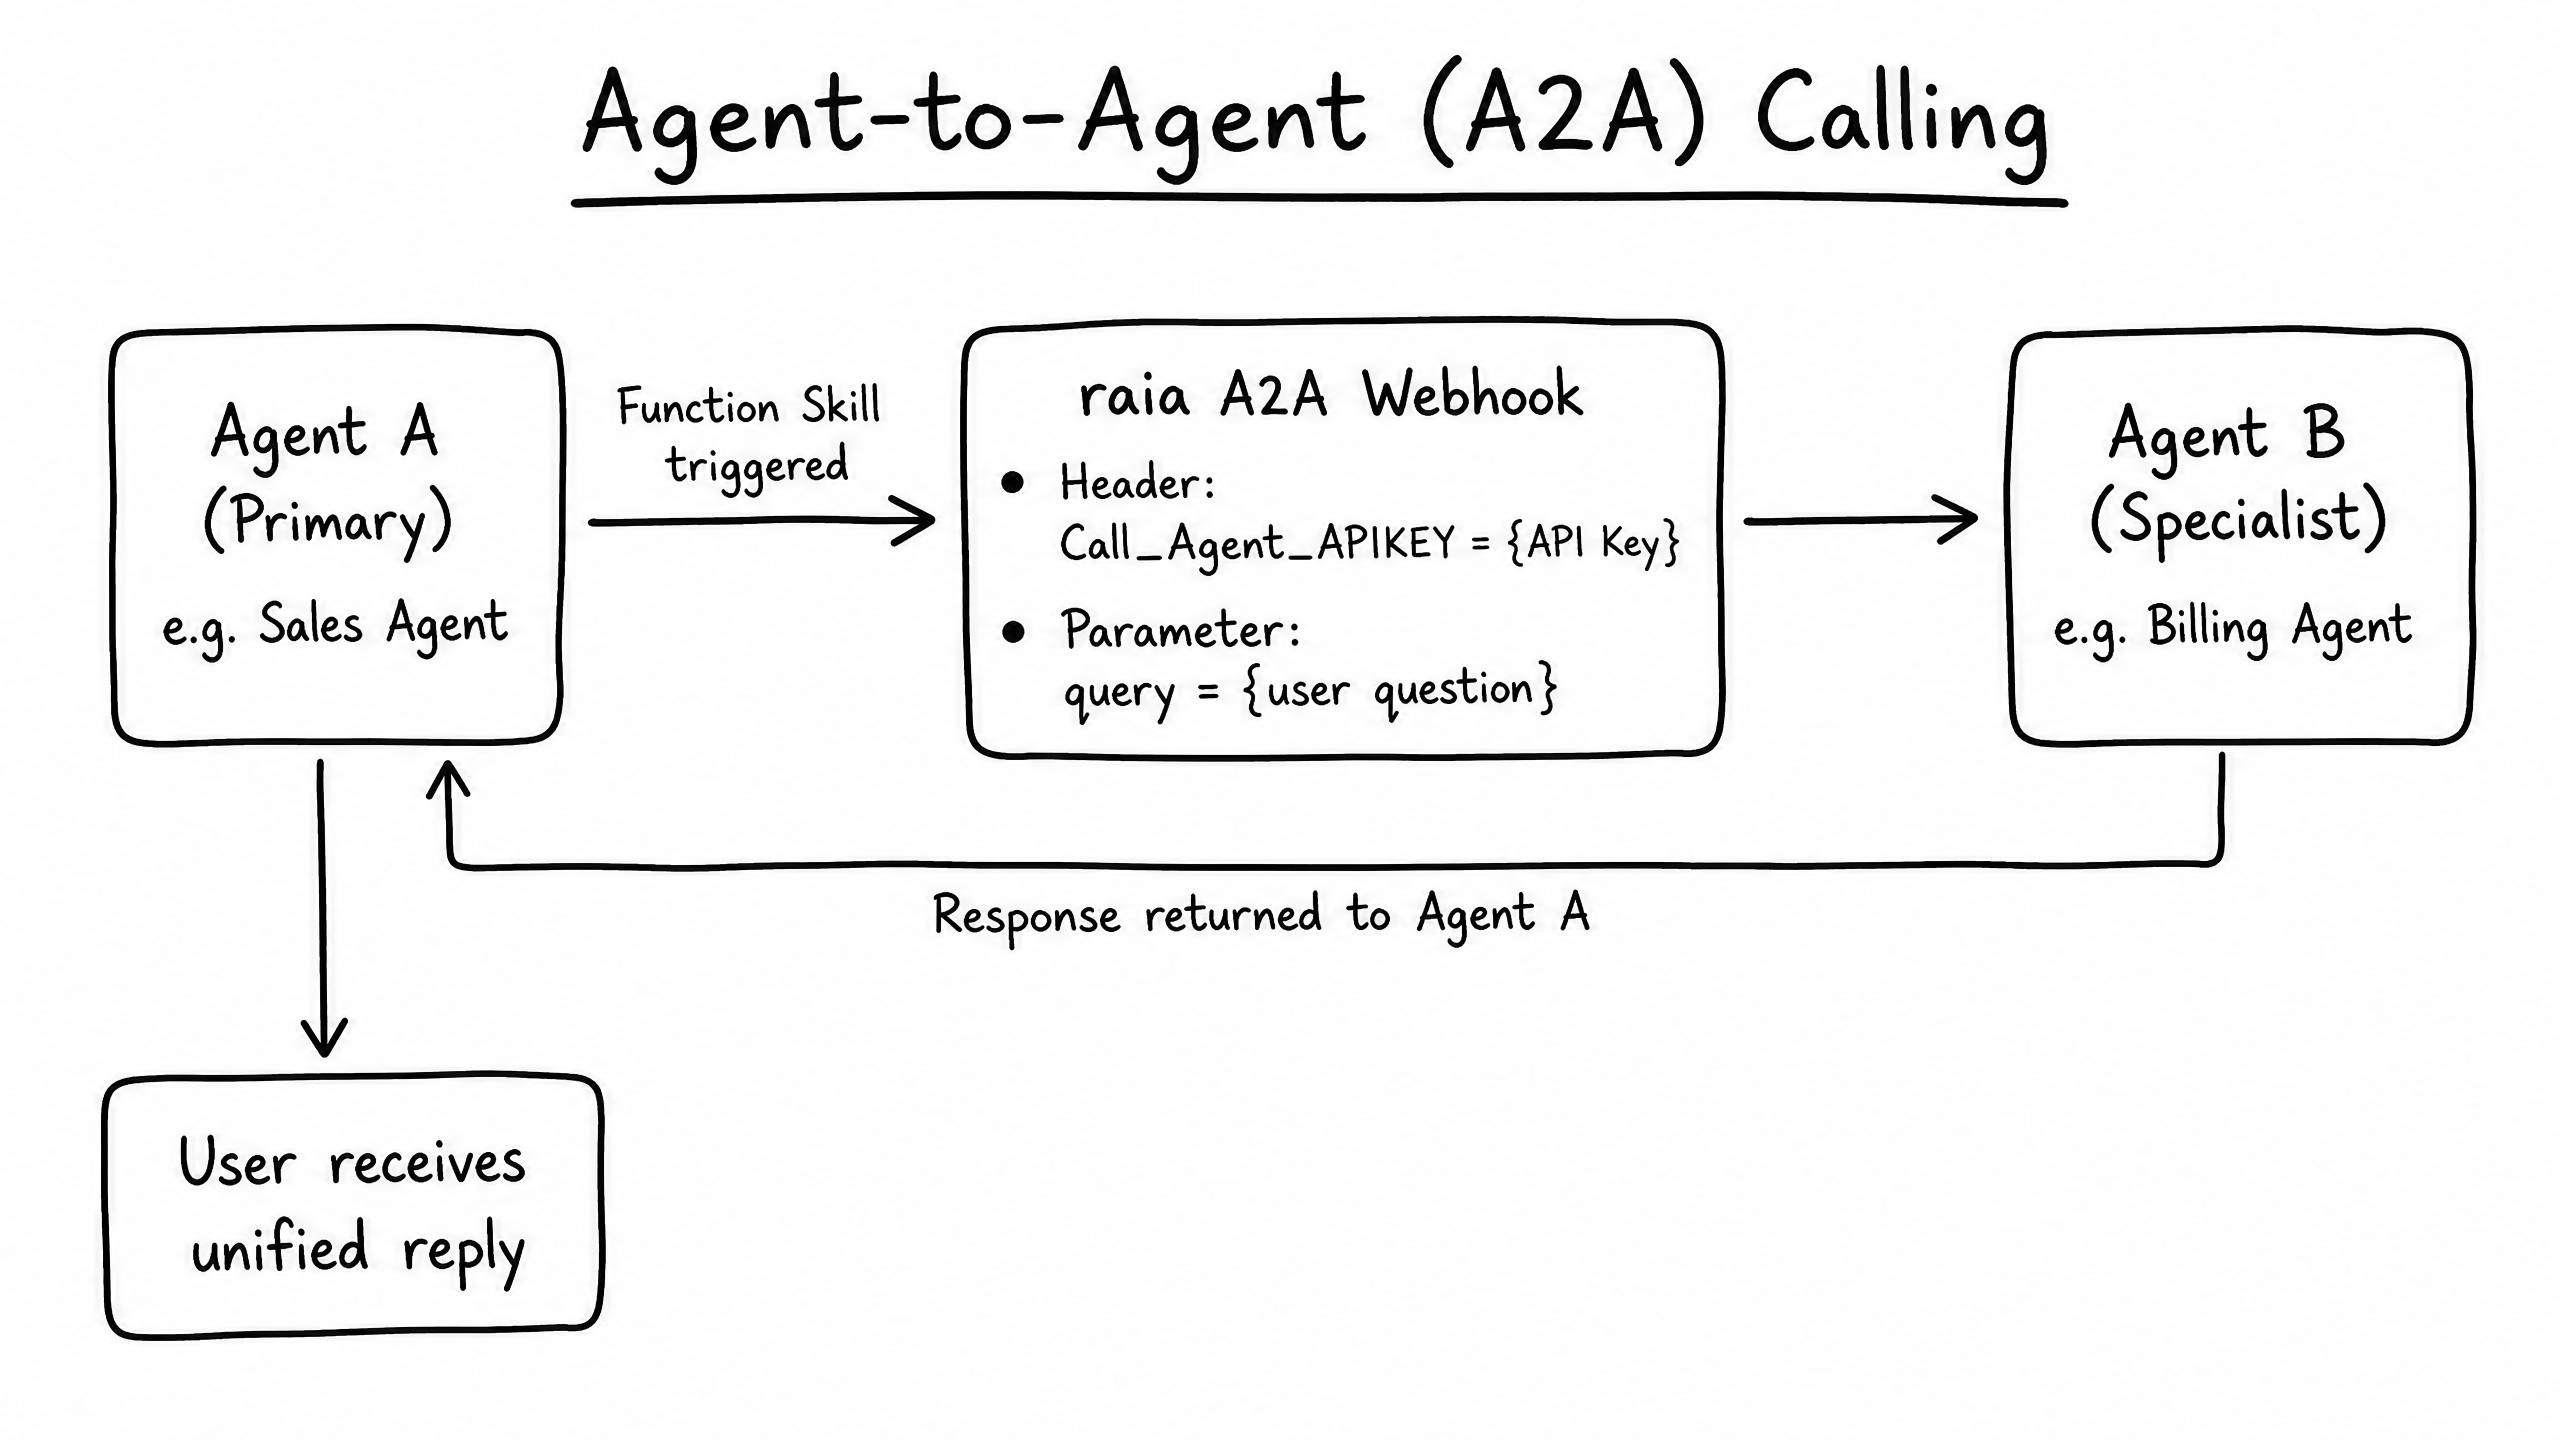
One of the most powerful uses of the Functions Skill is Agent-to-Agent calling. A primary agent (a general customer service bot) can route complex, specialized queries to a secondary expert agent (billing, technical support), retrieve the answer, and seamlessly pass it back to the user.
Setting up an A2A function
Step 01
Webhook URL
Use the generic A2A endpoint provided in your dashboard (e.g., https://raia.app.n8n.cloud/webhook/...).
Step 02
Parameters
Define a single parameter called query (type: string) — the user's question passed to the second agent.
Step 03
Headers
Add a custom header Call_Agent_APIKEY with the API Key of the destination agent.
When the primary agent encounters a question outside its domain, it triggers this function, passing the query parameter to the A2A webhook. The webhook authenticates via the header, queries the secondary agent, and returns the specialized response back to the primary agent to deliver to the user.
Best Practices
Write clear instructions
The AI relies entirely on your Function Instructions to know when to trigger the webhook. Be explicit — e.g., "Trigger this function ONLY when the user explicitly asks to cancel their subscription and provides an account ID."
Define strict parameters
Use clear parameter names and mark required vs optional. If a required parameter is missing, the AI will naturally ask the user for it before executing the function.
Use the Logs tab
If a function isn't firing correctly, check the Logs tab in the Launch Pad. Clicking Debug on a log entry reveals the exact JSON payload sent and HTTP response received — making parameter mismatches and auth errors easy to spot.