MCP · Integrations
MCP Integrations — Connect Your Agent to External Applications
The other side of MCP: instead of exposing your agent to external clients, give your agent tools from applications like Stripe, GitHub, Notion, Slack, and Salesforce so it can take real actions during conversations.
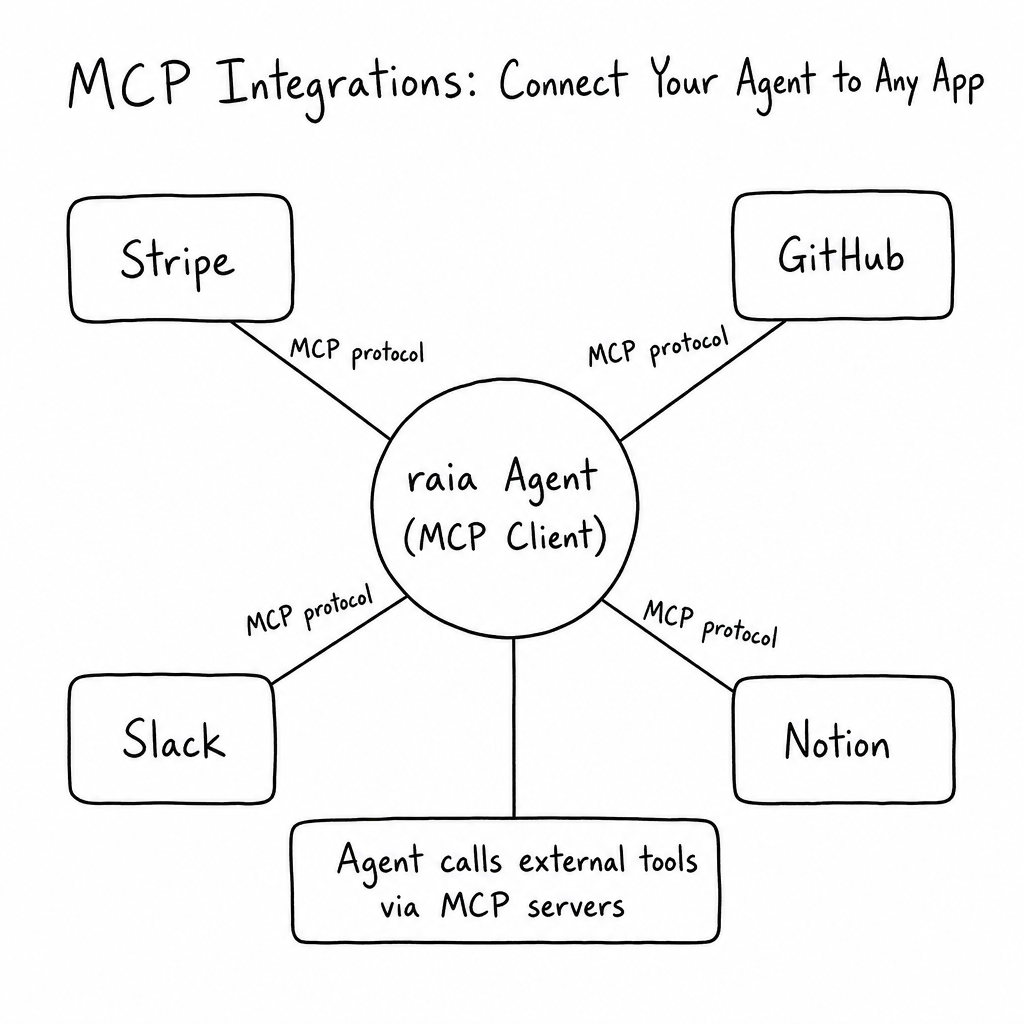
What are MCP Integrations?
MCP Integrations allow your raia agent to connect to external applications and services that support the Model Context Protocol (MCP). When you add an integration, your agent gains the ability to call tools provided by that application during conversations — such as looking up customer data in a CRM, creating tickets in a project management tool, or retrieving payment information from a billing platform.
Your agent is no longer limited to its own knowledge base. It can reach into the systems your team already uses and take real actions on behalf of users, all within a natural conversation.
How it works
- 01
The agent receives the user's message and evaluates whether any connected tools are relevant.
- 02
If a tool is needed, the agent calls the external MCP server using the configured URL and credentials.
- 03
The MCP server executes the tool (e.g. looks up a record, creates an item, runs a query) and returns the result.
- 04
The agent incorporates the result into its response and replies to the user naturally.
This happens automatically. The user does not need to know which tools are being called — they simply ask a question and receive an answer that draws on live data from your connected systems.
Supported transport types
| Transport | Description | When to use |
|---|---|---|
| Streamable HTTP | The modern standard for MCP communication. Uses standard HTTP POST requests with optional streaming. | Recommended for most integrations. Use this unless the server only supports SSE. |
| SSE (Server-Sent Events) | An older transport protocol where the client connects via an event stream. | Use only if the MCP server documentation specifies SSE as the required transport. |
Setting up an integration
Prerequisites: an active raia agent with the MCP Skill enabled, the MCP server URL for the application you want to connect, and any required authentication credentials (API key, bearer token, or authorization header value).
Step 1 — Open the Integrations tab
Open your agent in the raia Dashboard, go to the agent's settings, select the MCP Skill page, and switch to the Integrations tab.
Step 2 — Create a new integration
Click New Integration. Fill in the form:
| Field | Required | Description |
|---|---|---|
| Name | Yes | A descriptive name for this integration (e.g. "Stripe Payments", "GitHub Issues"). This name is shown to the AI model to help it understand what the integration does. |
| Description | Yes | A clear explanation of what this integration provides. Write this as if you are telling the agent when and why it should use these tools. |
| URL | Yes | The MCP server endpoint URL (e.g. https://mcp.stripe.com/v1/mcp). |
| Transport | Yes | Choose Streamable HTTP (recommended) or SSE. |
| Authorization | No | The bearer token or API key for authenticating with the MCP server. If provided, raia sends it as Authorization: Bearer <value> in every request. |
| Custom Headers | No | Any additional HTTP headers required by the server (e.g. X-API-Key, X-Workspace-ID). |
Step 3 — Fetch available tools
After filling in the URL and authentication details, click Get Available Tools. raia connects to the MCP server and retrieves the list of tools it offers. For example, a Stripe MCP server might expose:
get_invoice— retrieve details about a specific invoicelist_customers— search for customers by email or namecreate_refund— issue a refund for a charge
Step 4 — Select tools
Check the boxes next to the tools you want your agent to access. You do not need to enable all tools — only select those relevant to your agent's purpose. Limiting tools helps the agent make better decisions about when to use them.
Step 5 — Save the integration
Click Add Integration. The integration is now active and your agent can immediately begin using the selected tools in conversations.
Managing integrations
All integrations for an agent are listed in the Integrations tab. Click any integration to open its detail view where you can update its name, description, URL, or credentials, change which tools are enabled, or toggle it between Active and Inactive. To temporarily disable an integration without deleting it, set its status to Inactive. To remove it permanently, click Delete from the detail view — this cannot be undone.
Writing effective descriptions
The Name and Description fields are critical because they directly influence when the AI model decides to use the integration. Write them as clear instructions.
Good
Name: Stripe Payments
Description: Use this integration to look up customer payment information, retrieve invoice details, check subscription status, and process refunds. Call these tools when a user asks about billing, payments, charges, or invoices.
Poor
Name: Stripe
Description: Stripe API connection.
The more specific your description, the more accurately the agent will know when to invoke the tools.
Security considerations
When you provide an Authorization token, raia stores it securely and includes it in every request to the MCP server. The token is never exposed to end-users or included in conversation responses.
The MCP server must be reachable from raia's cloud infrastructure over the public internet. Servers behind private networks, VPNs, or firewalls will not be accessible unless you expose them through a tunnel or proxy. raia also applies these safety filters:
- Localhost URLs are blocked — you cannot connect to
127.0.0.1orlocalhost. - Self-referencing URLs are blocked — you cannot point an integration back at raia's own API domain.
Tool approval
Troubleshooting
| Issue | Possible cause | Solution |
|---|---|---|
| "Unable to fetch tools" when clicking Get Available Tools | URL is incorrect or server is unreachable | Verify the URL is correct and accessible from the public internet. Check that the authorization token is valid. |
| Agent never calls the integration tools | Description is too vague or tools are not relevant to user queries | Rewrite the description to be more specific. Test with explicit requests like "Look up invoice #123 in Stripe." |
| Tool calls return errors during conversation | Authorization token expired or server-side issue | Update the authorization token in the integration settings. Check the MCP server's status. |
| Integration shows as Active but tools don't appear | No tools were selected during setup | Edit the integration and click Get Available Tools again, then select the tools you need. |
Examples of popular MCP servers
The MCP ecosystem is growing rapidly. Applications like these already ship MCP servers you can connect to your raia agent — check each application's documentation for their specific MCP server URL and authentication requirements.
| Application | Use case | Example tools |
|---|---|---|
| Stripe | Payments & billing | Look up invoices, list customers, check subscription status |
| GitHub | Code & project management | Search issues, create pull requests, list repositories |
| Notion | Knowledge & documentation | Search pages, create database entries, update content |
| Slack | Team communication | Send messages, search channels, list users |
| Linear | Issue tracking | Create issues, update status, search projects |
| Salesforce | CRM | Look up contacts, update opportunities, search accounts |
| PostgreSQL / Supabase | Database access | Run queries, list tables, retrieve records |
Quick reference example
A typical Stripe integration configuration looks like this:
{
  "name": "Stripe Payments",
  "description": "Use to look up invoices, customers, and subscriptions, and to process refunds when users ask about billing.",
  "url": "https://mcp.stripe.com/v1/mcp",
  "transport": "streamableHttp",
  "authorization": "Bearer sk_live_************",
  "tools": ["get_invoice", "list_customers", "create_refund"]
}
Summary
MCP Integrations transform your raia agent from a standalone knowledge assistant into a connected tool that interacts with your entire software stack. Enable the MCP Skill, open the Integrations tab, add the MCP server URL and credentials, pick the tools you want, and save. Your agent is connected. Head back to the MCP Skill guide for the other direction — connecting external clients to your agent.